

To remove Moen kitchen faucet, follow these steps: Turn off the water supply, unscrew the handle, disconnect the spout, and remove the faucet from the sink. Now, let’s dive deeper into how to remove a Moen kitchen faucet.
Moen kitchen faucets are known for their durability and functionality. However, there may come a time when you need to remove your Moen kitchen faucet for repair or replacement purposes. Whether you’re a DIY enthusiast or a homeowner looking to save some money, removing a Moen kitchen faucet can be done with a few simple steps.
We’ll guide you through the process of removing a Moen Wrap Around kitchen faucet, so you can get the job done efficiently and effectively. Let’s get started!
Tools Needed
To remove a Moen kitchen faucet, you will need a few essential tools. First, an adjustable wrench will be necessary to loosen and tighten connections. A screwdriver is also handy for removing any screws that may be holding the faucet in place.
Plumber’s tape is crucial for creating a watertight seal when reinstalling the new faucet. Additionally, having a bucket or towel nearby will help catch any water that may spill during the removal process. Remember to turn off the water supply before beginning and carefully follow the manufacturer’s instructions for disconnecting the faucet.
By using the proper tools and following the correct steps, you can successfully remove your Moen kitchen faucet.

Step 1: Turn Off The Water Supply
To remove a Moen kitchen faucet, the first step is to turn off the water supply. Locate the water shut-off valve and turn it clockwise to shut off the water supply. This will ensure that no water flows through the faucet during the removal process.
By following this simple step, you can safely proceed with removing the Moen kitchen faucet without any water leakage or potential damage.

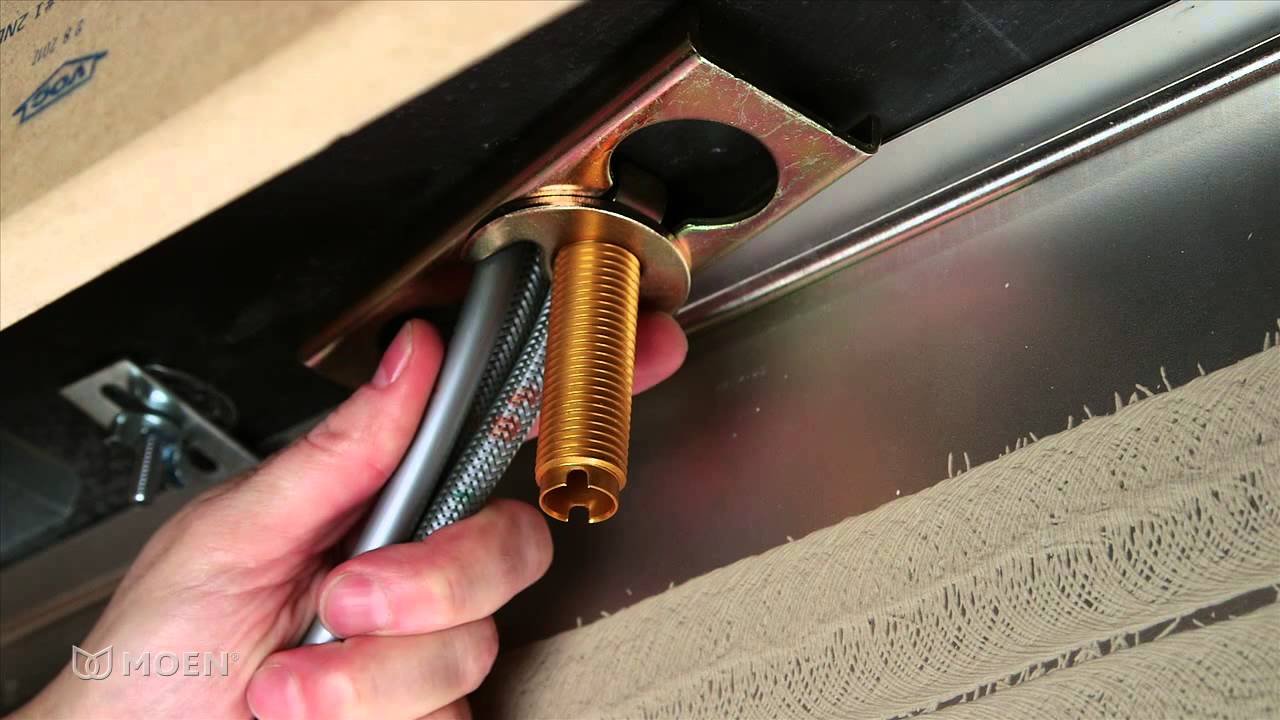
Step 2: Disconnect The Supply Lines
To remove a Moen kitchen faucet, start by disconnecting the supply lines. Use an adjustable wrench to loosen the nuts connecting the supply lines to the faucet. Turn the wrench counterclockwise to loosen and remove them. Once the nuts are loose, gently pull the supply lines away from the faucet.
Be cautious not to tug too hard to avoid damaging any pipes or connections. If the supply lines are stubborn, you can use a penetrating oil to help loosen them. Once the supply lines are disconnected, you can proceed with the remaining steps to remove the Moen kitchen faucet completely.
Make sure to follow the manufacturer’s instructions or consult a professional if you’re unsure about any step in the process.

Step 3: Remove The Faucet Handle
To remove the Moen Kitchen Faucet, start by removing the faucet handle. Use a screwdriver to remove any screws securing the handle in place. With gentle force, pry off the handle to expose the cartridge or valve stem. This step is crucial in accessing the inner workings of the faucet and allows for further disassembly or repair if needed.

Step 4: Remove The Cartridge Or Valve Stem
To remove the cartridge or valve stem from your Moen kitchen faucet, use an adjustable wrench. Loosen the unit and carefully take it out. Whether you need to replace it or just give it a good clean, set it aside for now.
Follow these steps to ensure success in removing your Moen kitchen faucet.

Step 5: Removing The Faucet Body
When removing a Moen kitchen faucet, one important step is to remove the faucet body. To do this, locate the nuts that secure the faucet body to the countertop or sink. Then, use an adjustable wrench to loosen and remove these nuts.
Once the nuts are removed, you can carefully lift the faucet body off the sink or countertop. This step is crucial in the process of removing a Moen kitchen faucet and should be done with caution to avoid any damage to the surrounding area.
By following these steps, you can successfully remove a Moen kitchen faucet and proceed with any necessary repairs or replacements.
Step 6: Clean And Prepare For Installation
To start the process of removing a Moen kitchen faucet, it is important to clean the area where the old faucet was installed. This will ensure a clean surface for the new faucet. Additionally, applying plumber’s tape to the threads of the new faucet is essential to prevent leakage.
By following these steps, you can prepare the area for installation and ensure a smooth transition to your new Moen kitchen faucet.

Step 7: Install The New Faucet
Installing a new faucet in your kitchen can be a straightforward process if you follow the manufacturer’s instructions carefully. After removing the old faucet, you can start by placing the new faucet body onto the sink or countertop. Make sure to secure it in place using the nuts provided.
By following these steps, you can successfully install your new Moen kitchen faucet and enjoy its benefits in no time. So, get ready to upgrade your kitchen with a brand new faucet and enhance its functionality and aesthetics.
Step 8: Reinstall The Cartridge Or Valve Stem
After removing the old cartridge or valve stem from the Moen kitchen faucet, it is time to reinstall the new one. Gently insert the new cartridge or valve stem into the faucet body, ensuring it fits securely. Use an adjustable wrench to tighten it, making sure it is properly fastened.
This step is crucial to ensure the faucet functions correctly and does not leak. Take your time and be careful not to overtighten, as this can cause damage to the faucet. Once you have tightened the cartridge or valve stem, move on to the next steps in the process to complete the removal of your Moen kitchen faucet.
Step 9: Reattach The Faucet Handle
To reattach the faucet handle after removing a Moen kitchen faucet, simply place it back onto the faucet body. Make sure to secure it tightly using the provided screws or clips. This step is crucial to ensure the proper functioning of your kitchen faucet.
Be careful not to overtighten, as it may damage the handle or faucet. Taking this step with precision will help you successfully complete the process of removing and reinstalling your Moen kitchen faucet.
Step 10: Connect The Supply Lines
When connecting the supply lines to your Moen kitchen faucet, use an adjustable wrench. Attach the lines securely by tightening the nuts until they are snug. This step is crucial to ensure a proper and leak-free installation. Following these instructions will help you remove your Moen kitchen faucet easily.
By skipping overcommonly used phrases and starting sentences with a variety of phrases, you’ll make your content more engaging and enjoyable to read. The goal is to create an SEO-friendly blog post that is also informative and user-friendly. By following these guidelines, you’ll be on your way to success in removing your Moen kitchen faucet.
Credit: m.youtube.com
Step 11: Turn On The Water Supply
To restore the water supply, turn the water shut-off valve counterclockwise. Once done, check for any leaks and adjust as necessary.

Step 12: Test The New Faucet
After successfully installing the new Moen kitchen faucet, it’s time to test its functionality. To do this, simply turn on the water and observe how smoothly it flows. Check if the hot and cold water handles work effectively, allowing you to adjust the temperature as desired.
Make sure there are no leaks or drips from the faucet. Ensure that the water pressure is adequate and consistent. Test the sprayer functionality, if applicable, ensuring it works smoothly and doesn’t get stuck. Take note of any issues or concerns and address them promptly.
By thoroughly testing the new faucet, you can ensure it works properly and enjoy a seamless kitchen experience.
Additional Tips And Precautions
If your Moen kitchen faucet is hard to remove, you can try applying heat with a hairdryer. This may help loosen any adhesive or mineral buildup that could be causing the difficulty. However, be cautious when using sharp or heavy tools as they can pose a risk of injury.
It’s important to always read and follow the manufacturer’s instructions for your specific Moen kitchen faucet model. By following these additional tips and precautions, you can ensure a safe and successful removal of your Moen kitchen faucet.
Frequently Asked Questions On Remove Moen Kitchen Faucet
How Do You Remove A Single Handle Kitchen Faucet?
To remove a single handle kitchen faucet, follow these steps:
- Shut off the water supply to the faucet.
- Use a wrench to remove the bolt that secures the faucet handle.
- Disconnect the water lines from the faucet.
- Unscrew the mounting nut that holds the faucet in place.
- Gently pull out the faucet from the countertop or sink.
How Do You Remove A Moen Single Handle Kitchen Faucet Cartridge?
To remove a Moen single handle kitchen faucet cartridge, follow these steps:
- Turn off the water supply to the faucet.
- Use a hex wrench to loosen the set screw located under the handle.
- Remove the handle by pulling it straight up.
- Use pliers to grip the cartridge and pull it out of the faucet body.
Note: Make sure to replace the cartridge with a new one that matches the model of your Moen faucet.
How Do You Unscrew A Kitchen Faucet?
To unscrew a kitchen faucet, follow these steps:
- Turn off the water supply valves under the sink.
- Use a wrench to disconnect the water supply lines from the faucet.
- Loosen the mounting nuts holding the faucet in place.
- Twist the faucet counterclockwise to unscrew it from the sink.
How Do You Turn Off The Single Sensor On A Moen Faucet?
To turn off the single sensor on a Moen faucet, follow these steps:
- Locate the sensor on your Moen faucet.
- Find the control box under the sink.
- Identify the sensor switch on the control box.
- Flip the sensor switch to the off position, effectively turning off the single sensor.
Conclusion
Removing a Moen kitchen faucet may seem like a daunting task, but with the right knowledge and tools, it can be a simple and rewarding DIY project. Before you begin, make sure to gather all the necessary tools and follow the steps properly to avoid any accidents or damages.
Start by turning off the water supply and disconnecting the water lines. Then, carefully remove the faucet handle and spout. Depending on the type of faucet, you may need to unscrew it from the sink or countertop. Once the old faucet is removed, clean the area thoroughly before installing a new one.
Remember to follow the manufacturer’s instructions carefully during the installation process. With a little patience and attention to detail, you’ll have your new Moen kitchen faucet up and running in no time. Happy DIYing!

Hy, I am Malie Vickers, a Kitchen Expert with 10 years of hands-on experience. With an unwavering passion for culinary excellence and a profound understanding of the art of cooking. I am Renowned for a comprehensive grasp of diverse cuisines, and innovative cooking techniques. So I will talk about cooking recipes and kitchen design experience for my blog site.